Trading, Tutorials
How to verify a trader account? Step-by-step guide
Last updated: May 28, 2019 8 min read
Vilius B.
The account verification process can sometimes be tiresome and confusing. Don’t worry – we are here to walk you through it with this extensive step-by-step guide and cover all the potentially tricky parts.
Before you can start the verification, it is important to clarify whether you are a trader or a merchant. It will determine the kinds of documents we may ask from you.
For example, if you only intend to buy or sell cryptocurrencies from a personal account, you should verify as a trader. However, if you wish to set up cryptocurrency payment methods for your business, click the “Create a Business Account” button in the right corner of the dashboard, fill in the necessary fields and continue from there.
Learn how to verify your business account instead
You can also choose to go through the simplified KYC process which allows traders to use CoinGate’s trading services with less KYC required than usual.
But before we get into it, let’s take a second to understand why verifying your identity is crucial for using our trading platform.
Why do I need to verify my identity?
We ask you to provide your ID so we could make sure that all of our customers are legitimate and we are not providing services to criminals. All is done according to the international regulatory requirements like the 5th AML Directive that we, as a company, have no choice but to follow.
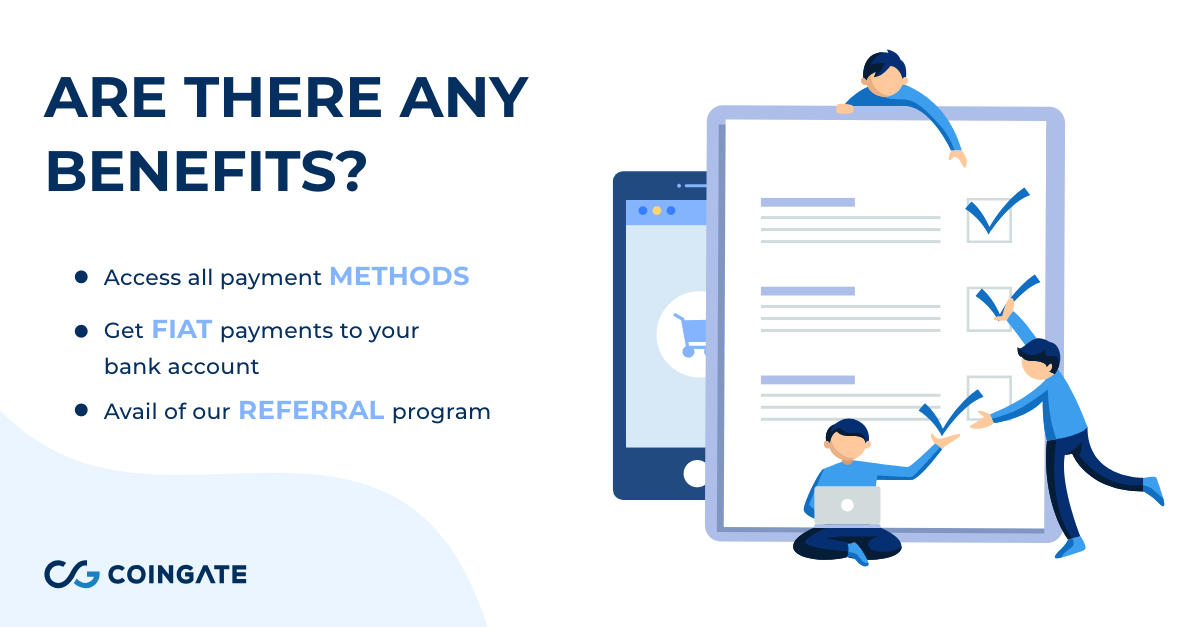
Otherwise, we couldn’t provide our services as it would put our company and our clients in jeopardy. In other words, there is no way around it if you wish to access all payment methods and features like crypto-to-fiat payouts to the bank account.
There are three key things we have to know before providing the service:
- Who is this person or company that wants to use the service;
- Where does the money come from (if plan to exceed 15,000 Euros per year);
- What is the purpose of using the service?
What happens with provided sensitive data?
All the documents we ask for are encrypted and protected according to the guidelines of the General Data Protection Regulation (GDPR), and will be used only to identify the client and justify the planned activities.
Failure to protect our customer’s data would result in extreme fines for our company that can reach up to 20 million euros, or 4% of the total worldwide annual turnover, as well as lost reputation and even clients’ mistrust. And we don’t want that!
Read more about the GDPR from our CEO Dmitrijus Borisenka
What documents do you require?
For sole traders, providing a photo and valid ID is enough (preferably International Passport, or Identity Card). For our security and your convenience, all our customers go through live ID verification using Onfido.
According to the local Lithuanian laws, this is the information that has to be shown on the document for us to consider it as a valid ID:
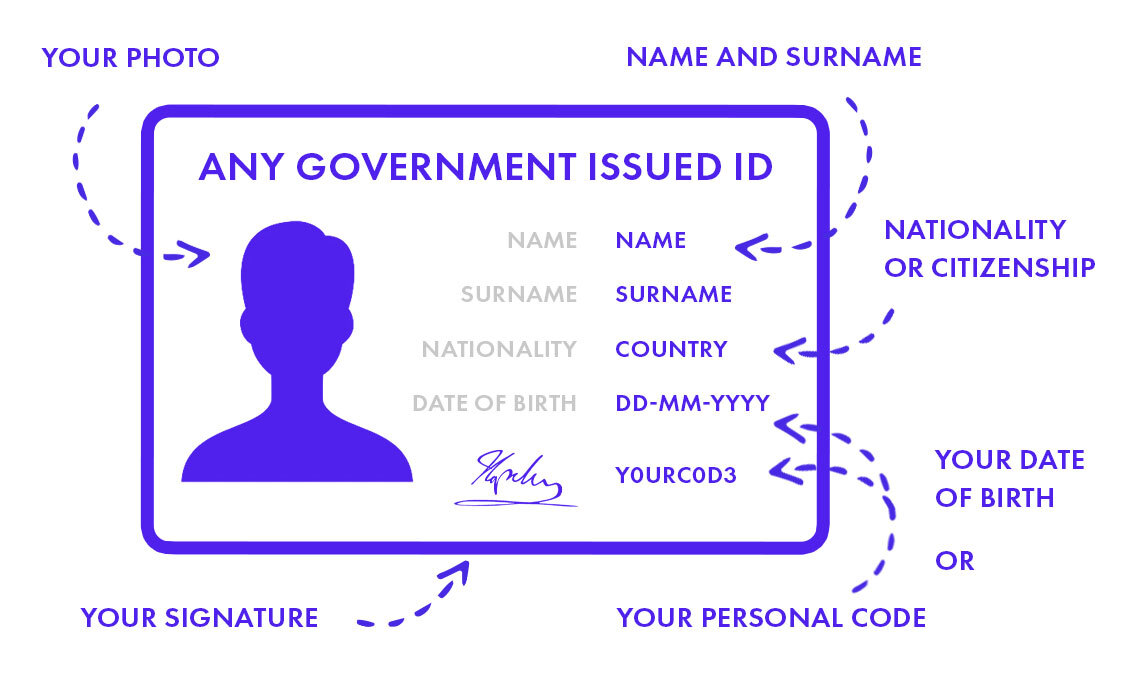
- Name and Surname;
- Photo;
- Nationality or Citizenship;
- Date of Birth or Personal Code;
- Signature.
What countries do you support?
You can find a list of supported countries here.
Although, it’s worth noting that the list is always changing. It depends on each country’s local laws, the risk level of fraud, terrorism or money laundering, and other significant reasons.
How do I verify my identity?
First, log into your CoinGate account, then proceed to the “Verification” tab in the ”Account” section, or select “Submit Verification” option from the main dashboard.
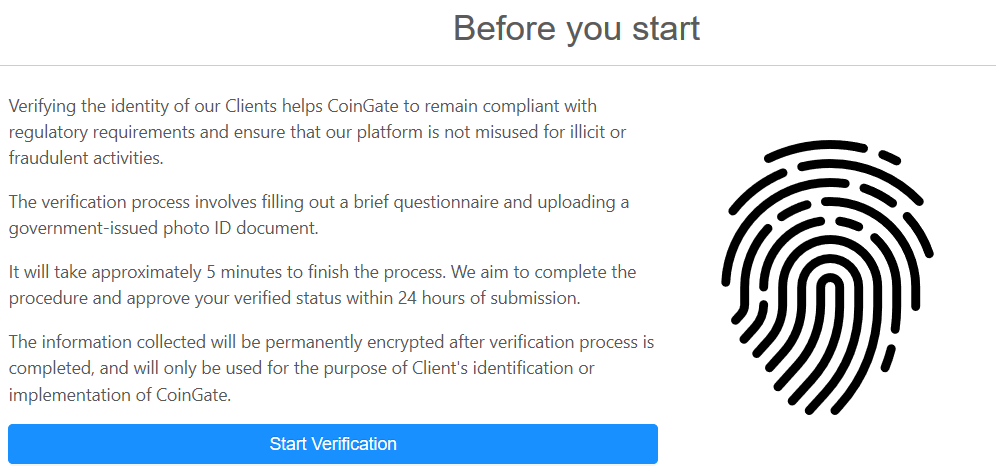
You will see a screen with the necessary information. Please take a moment to read it. You will also notice the “Start Verification” button down below. Click on it, and the verification process will begin.
Step #1: Fill in personal details
The first step – providing your full legal name, date of birth, and gender, just how it appears on the ID which we will ask you to provide later on.
Important: The information must match what’s on the ID document!
Next, fill in the details about your ID document that you intend to verify yourself with.
If you have an ID Card, write down your personal code, document number, and select document expiry date.
In case you don’t have a personal code, select the option that says “I don’t have a personal code”, then provide the document number and its expiry date. It is more common for those who only have International Passport.
When this is done, continue with your residential address, citizenship (that is a country that issued your ID), nationality (you can select few), and email address.
Lastly, specify whether you intend to carry out operations of more than 15,000 Euros per year. It determines whether we will have to ask you for more documentation proving your source of funds.
When ready, click “Next”.
Step #2: Specify the source of funds
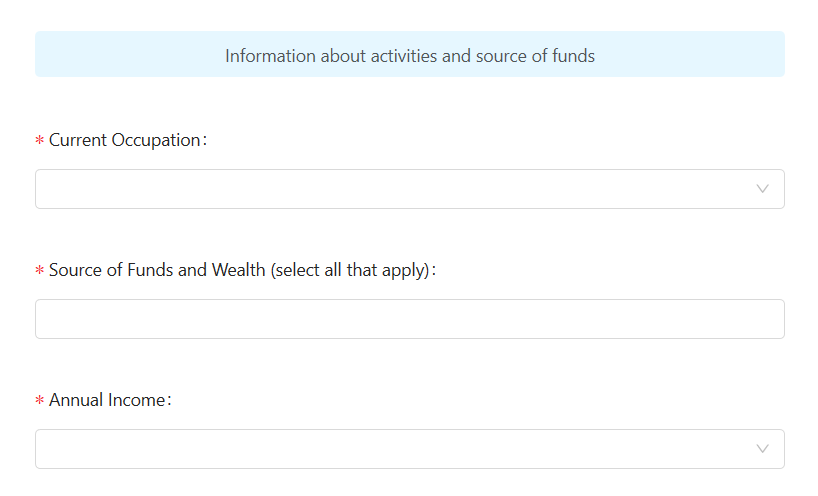
If you don’t plan to exceed 15,000 Euros per year, we won’t ask for additional documentation. Still, you have to select whether you’re currently employed, self-employed, student, retired, or other.
If employed, we will ask to specify the name of the company, your position, and a legal company address. If self-employed, please specify the industry you’re working in. If you select the “other” option, describe what you do for a living.
Lastly, specify your source of funds (you can choose more than one) and annual income, then continue to the next page.
Step #3: Revise account details
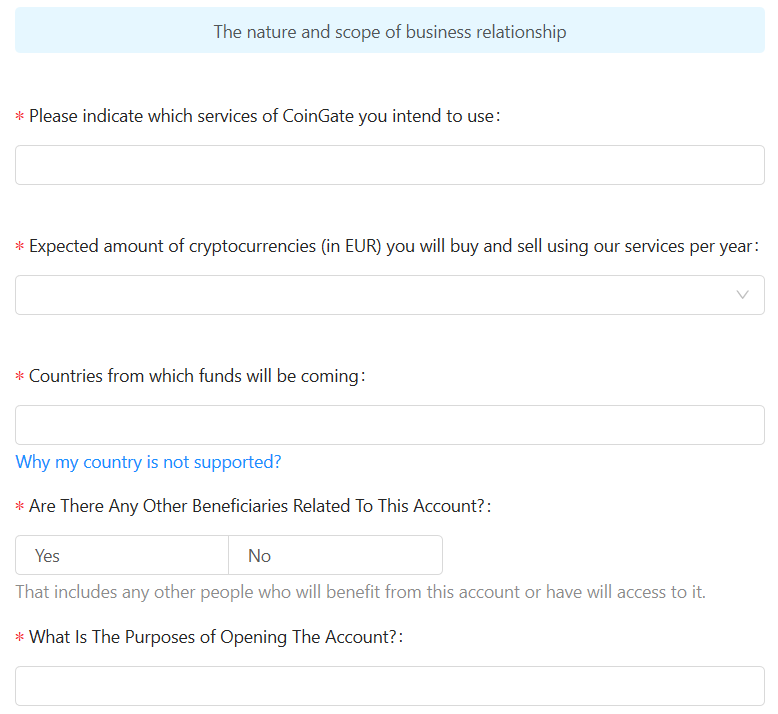
Now we have to know how you intend to use your account.
Select whether you plan to buy and/or sell cryptocurrencies, make mobile purchases, or all. Also, select a preliminary amount of Euros you intend to trade in a year. After that, choose countries you will be getting funds from and specify reasons for opening an account.
Don’t forget to select whether other people might use your account as well. If not, click on “No” and continue.
Step #4: Cover your political relations
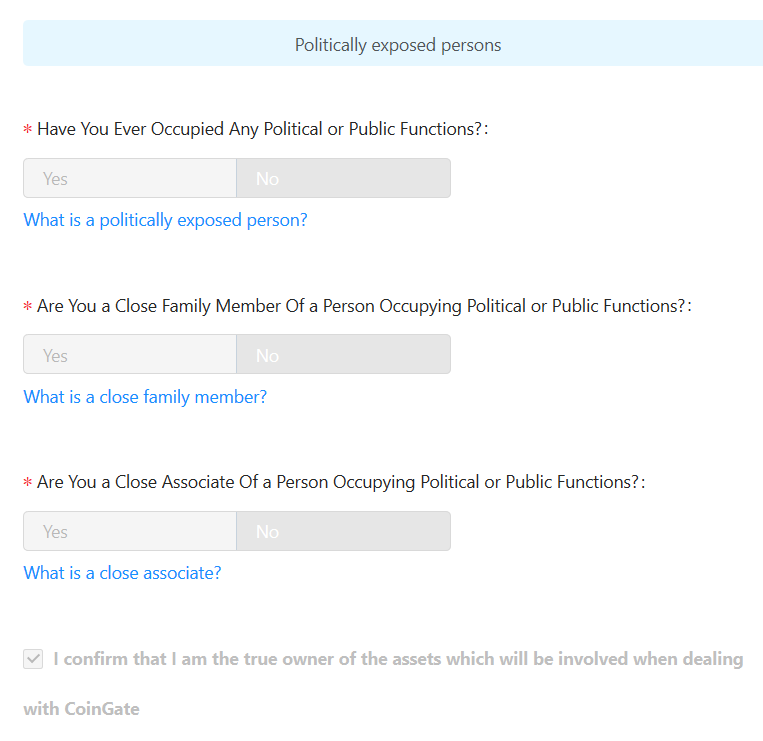
When we determine our customer’s risk score, your association or relation with politically or socially (celebrities, etc.) exposed persons means a lot.
First, we need to determine whether you are a politically exposed person, or not. If you are not considered as such, select “No”. Next, select whether you have associates or relatives that are entrusted with public functions.
Lastly, confirm that you are an owner of funds you will transfer through CoinGate and proceed to the next stage.
Step #5: Finalize the ID verification
The last step involves uploading your ID document to the Onfido system.
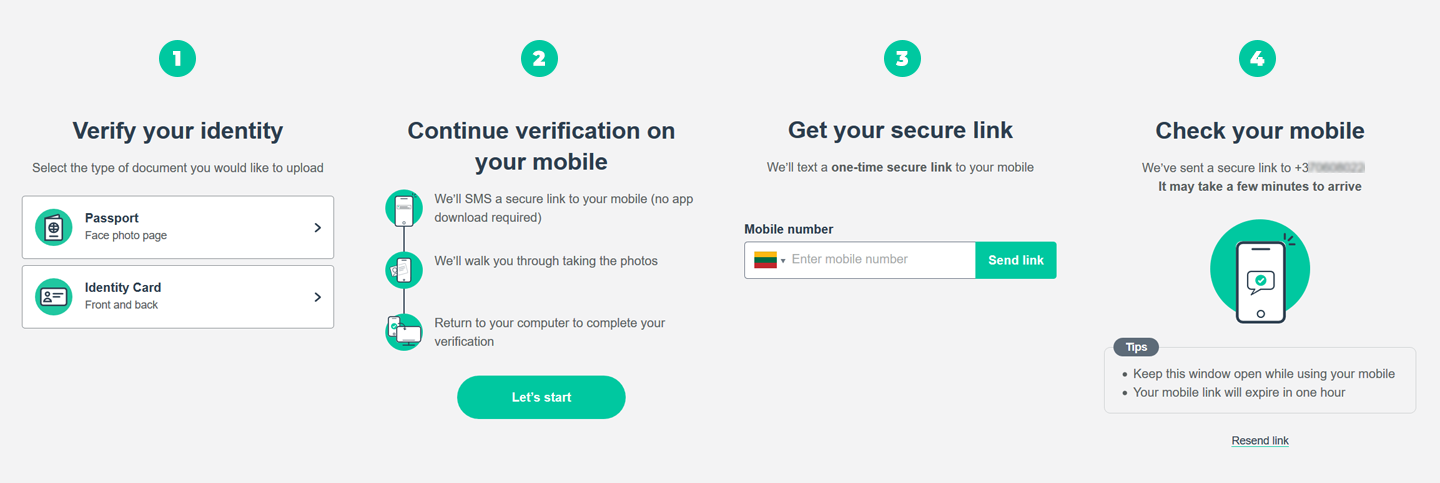
Click the “Verify Trader” button and choose the type of document you will upload. You will see a notification window informing that the verification process will begin, and for that, you need to have a mobile device.
Click “Let’s start” and provide your phone number. You will receive SMS with a secure link to the verification page. Open it, and the web app for verification will pop up. The process does not require you to have an Onfido app installed on your phone.
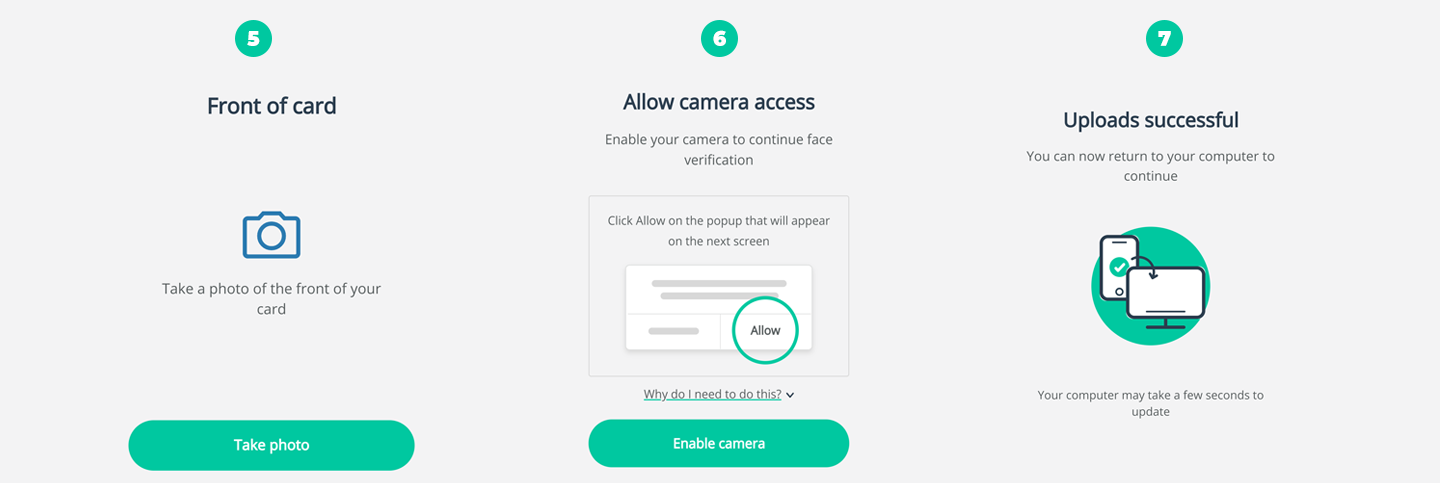
It will ask to take a picture of the front of your ID. When taking a picture, make sure it is clear and has no blur or glare. You will be able to check if the quality is good enough. If not, the system might reject your ID!
When done, the same process repeats for the back of the ID. The last step is a live face verification. For that, you will need to use the camera on your device. Click “Enable Camera” and take a selfie. Make sure that all your face fits in a circle. If the picture is of good quality, submit it.
You will see a confirmation window saying that the upload is completed. Now, return to your CoinGate account, click the “Submit Verification” button and that’s it!
You’re almost ready!
Soon, we will review the documents. If you did everything correctly, we will verify your account within 24 hours. Once done, you will get an email notification.
In the meantime, check out the methods of buying your cryptocurrencies on CoinGate, or ways to sell them.
Have any issues?
If you still have any questions or issues regarding the verification process, feel free to scout for answers on our knowledge base or contact CoinGate support team at support@coingate.com.
For solving issues related to the verification through the Onfido platform, please proceed here.
Written by:
Vilius B.
Knows as much about VPN as it is healthy for someone who isn't a VPN developer. Testing more text to see how it looks like. And a little bit more toblerone and on and on.
Knows as much about VPN as it is healthy for someone who isn't a VPN developer. Testing more text to see how it looks like. And a little bit more toblerone and on and on.
Related Articles


