Gift Cards, Trading, Tutorials
How To Buy Gift Cards With BTC, LTC, DOGE & Other Crypto?
Last updated: August 28, 2020 4 min read
Vilius B.

This is a step-by-step guide that explains how to make a purchase on CoinGate’s Gift Card store using cryptocurrencies.

All 3,000+ gift cards on the CoinGate Gift Card store are available to buy with 13 cryptocurrencies:
Bitcoin (BTC), Litecoin (LTC), Ethereum (ETH), TRON (TRX), XRP, Dogecoin (DOGE), Shiba Inu (SHIB), Tether (USDT), Binance USD (BUSD), Dai (DAI), Travala.com Token (AVA), Bitcoin Cash (BCH) and Bitcoin Vault (BTCV).
Note that the Bitcoin payment option also allows Lightning Network payments.
Step-by-step guide for buying gift cards with BTC, DOGE & other cryptos
1. Visit the official CoinGate Gift Card store and select a card
You can visit the store here.
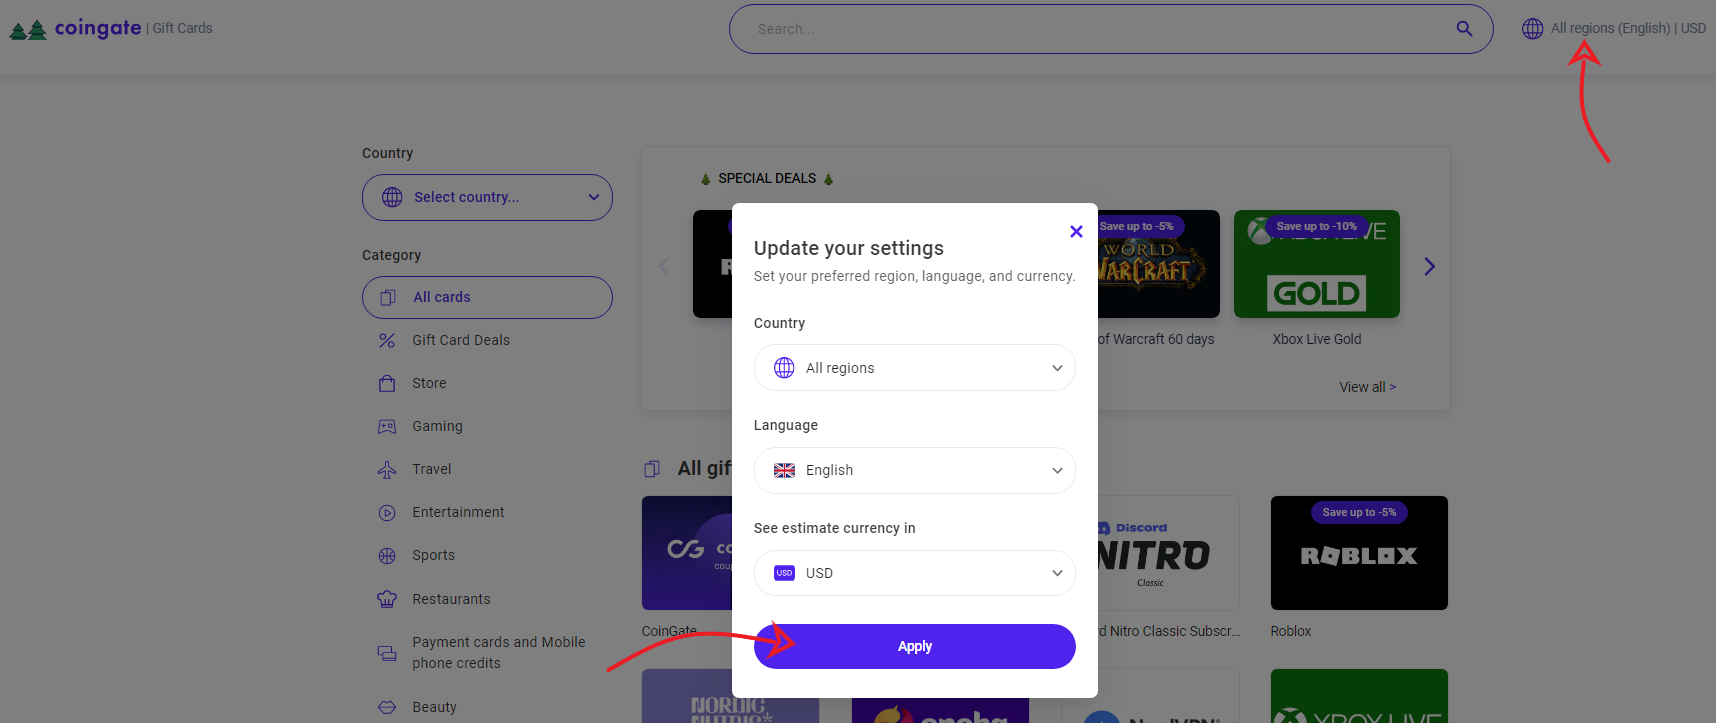
Right away, there’s the settings button at the top right corner of the page that allows you to select your national currency or cryptocurrency in which the gift card prices will be presented, regions where gift cards are available to be used, and the language of the website.
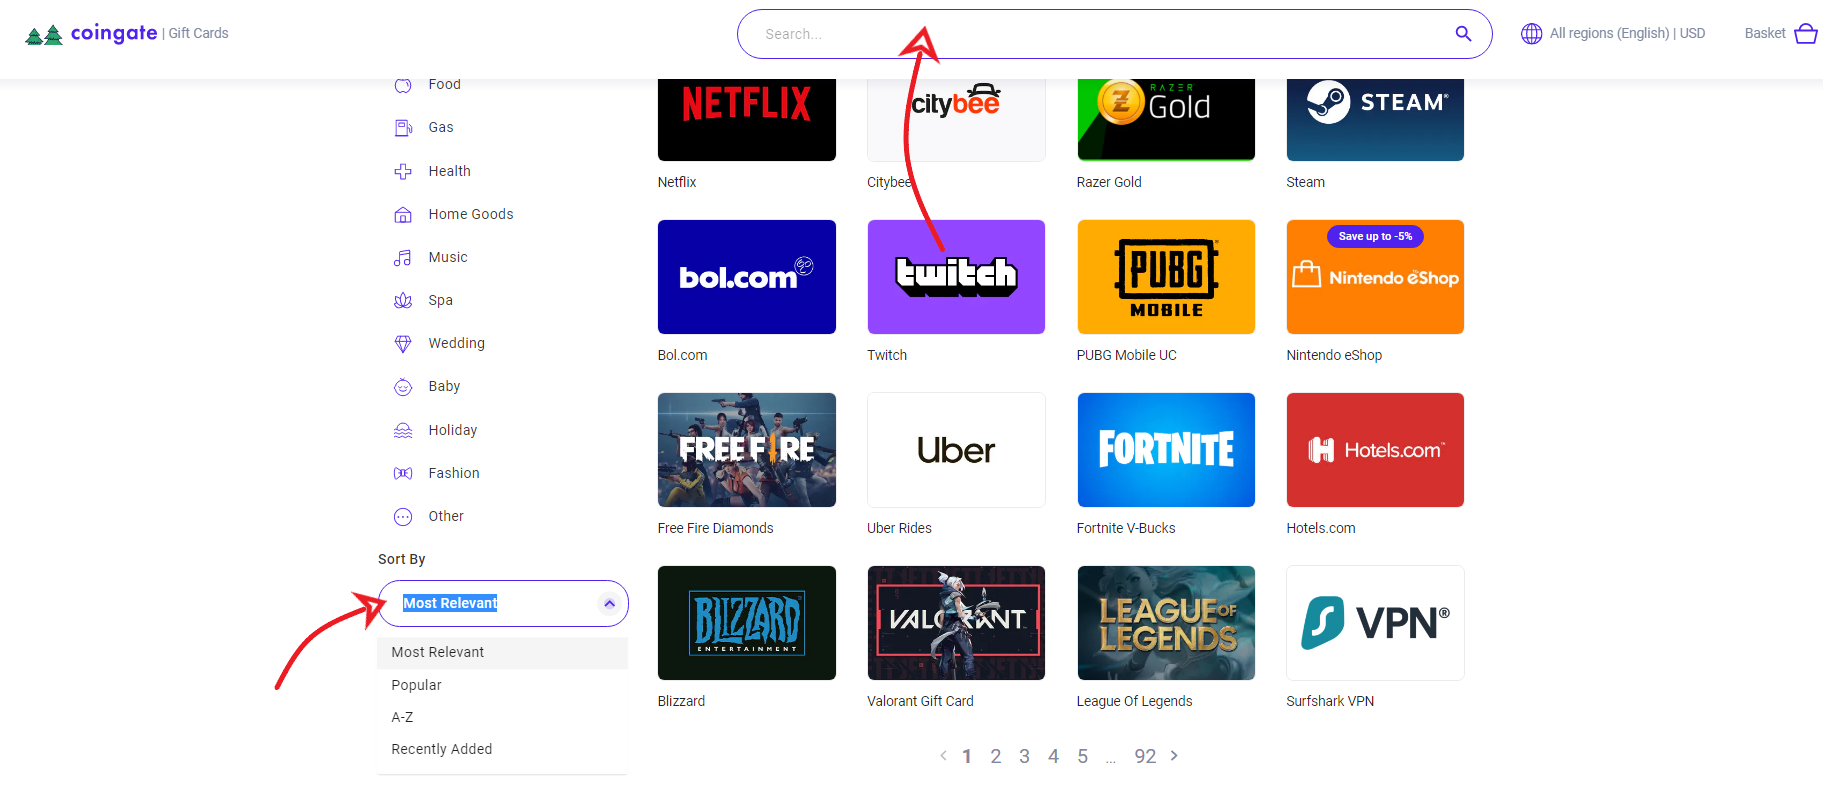
On top of it, feel free to use the search option, sort by categories, popularity, date added, and viable countries to find a card you want.
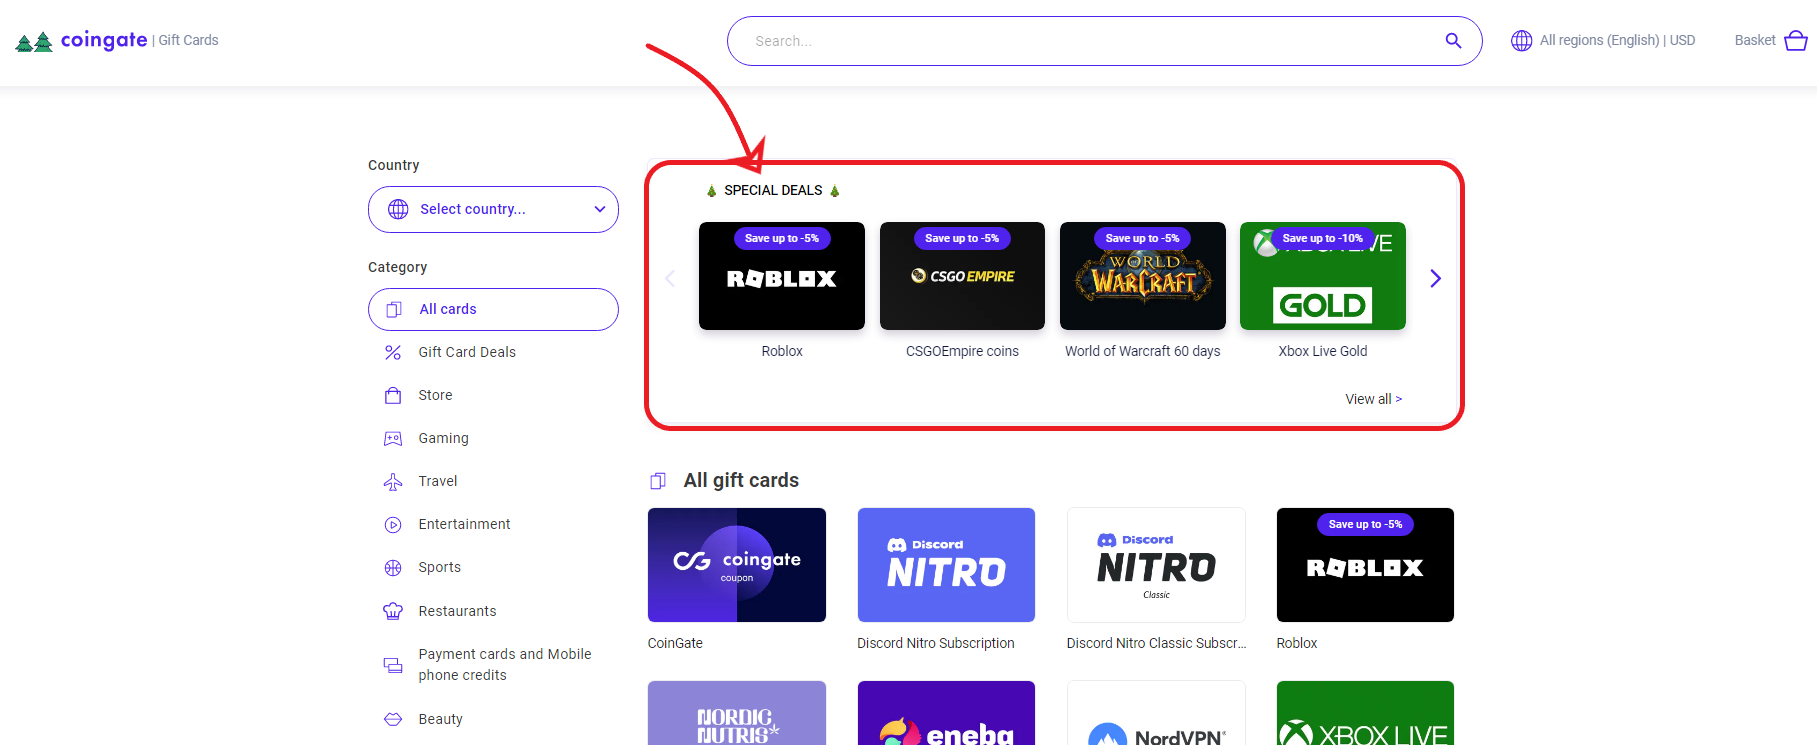
Also, be sure to check out the ‘Special Deals’ section for juicy discounts available that day.
2. Select denomination and add to basket
Pick a gift card and click on it to see available denominations.
Gift cards only allow selecting a fixed value. Click on the amount field to check available denominations.
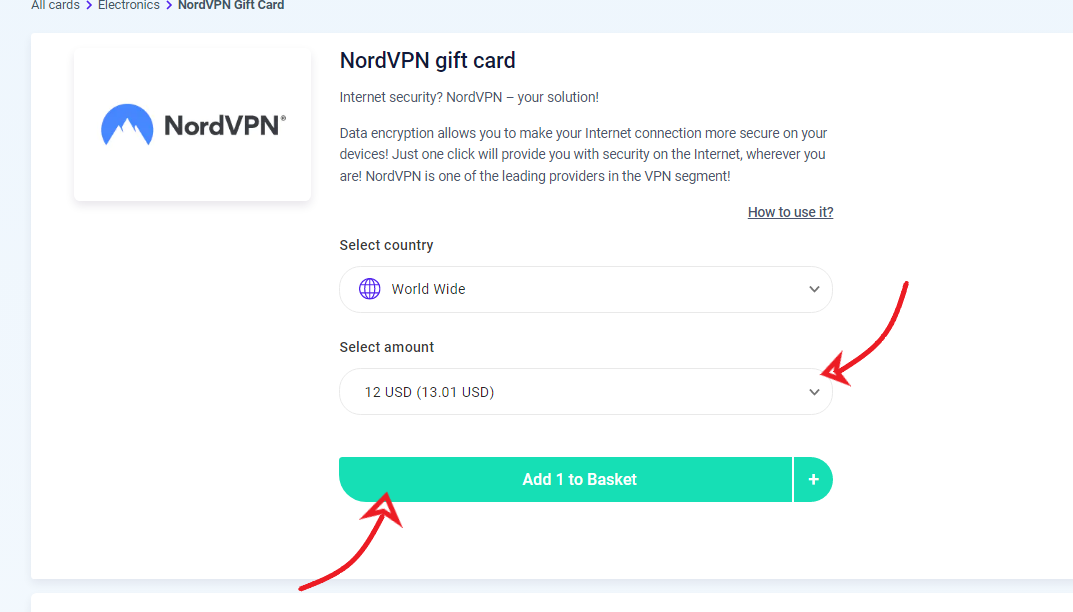
Notice that there are two price tags shown. The first one refers to the value of a gift card, the second one – the price of that gift card to pay.
Click the green button nearby, and all items will appear in the basket (also known as the shopping cart) The basket itself is accessible in the top right corner of the screen.
3. Proceed to the checkout page
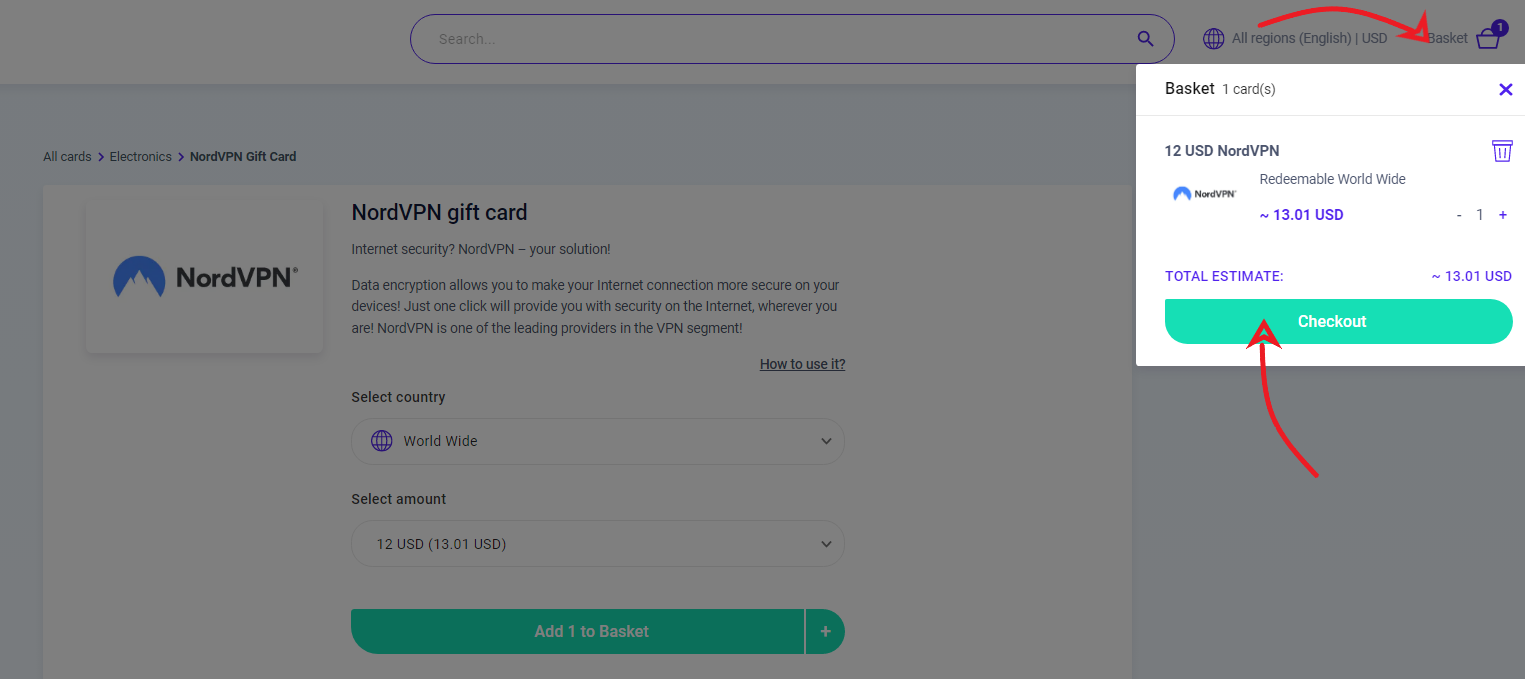
When you have all the cards you want in the basket, click the icon in the top right corner of your screen and click the “Checkout” button.
4. Enter an email address to receive a gift card code
After clicking the “Checkout” button, enter your email address where the card will be sent.
You can also send it as a gift to other people. Simply turn on the switch that says “Send as a Gift” and enter the required information. You can also add an optional message that will be attached to the email containing a gift card code.
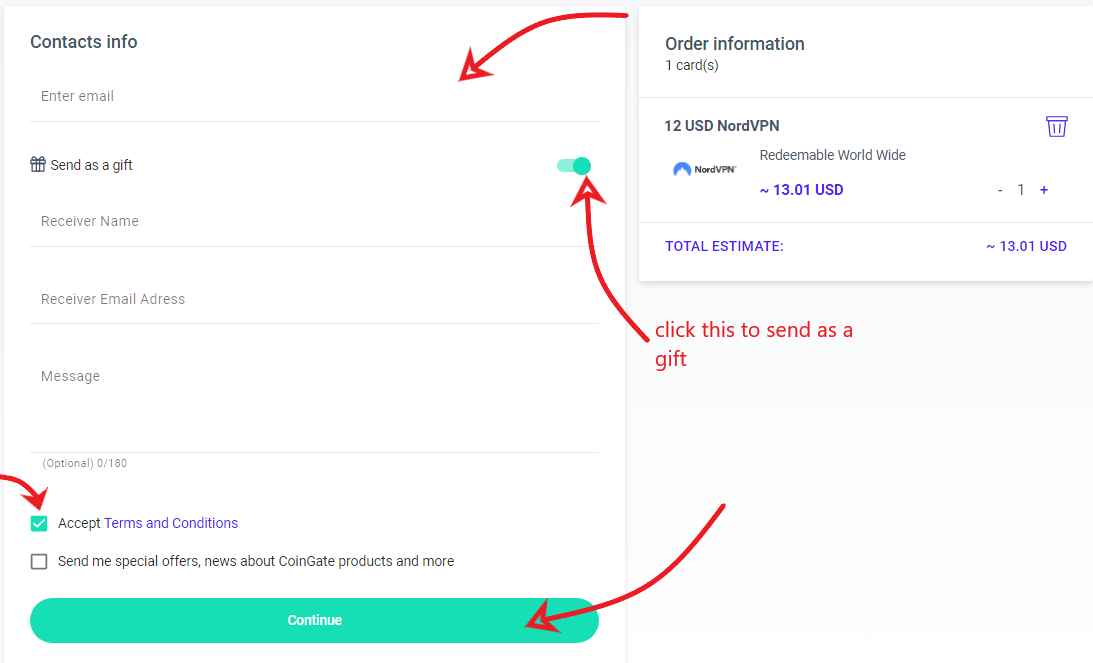
Lastly, don’t forget to read and agree with the Terms & Conditions, and then click “Continue”.
5. Choose your preferred payment option
You can either pay for gift cards via CoinGate invoice or using Binance Pay.
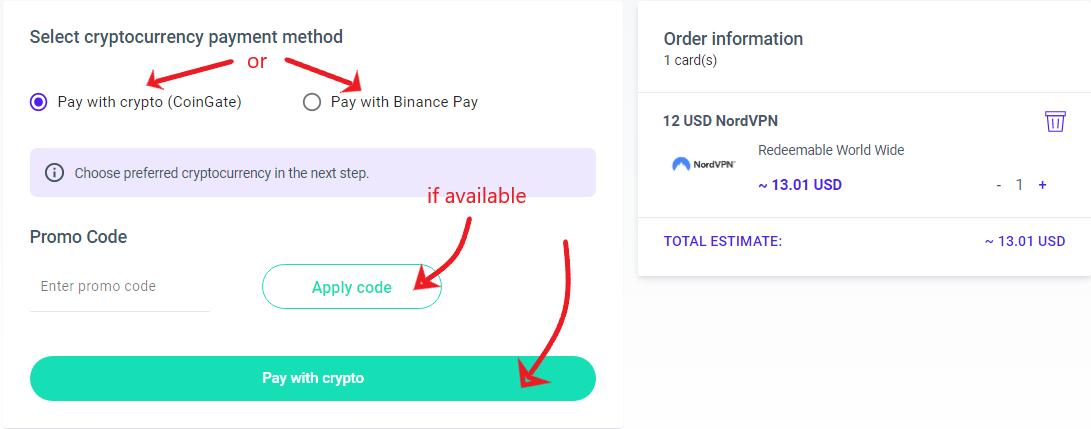
If you also have a promo code, don’t forget to use it by clicking on the “Promo Code or Coupon?” text, entering the code and applying it.
Review your order and, when done, click “Pay with crypto”.
6. Select a payment currency and make a payment
This is where you can choose a currency to pay with. When a currency is selected, send the exact amount to the provided cryptocurrency address or scan the QR code with your mobile wallet. Once payment is made, the invoice will show a confirmation message.
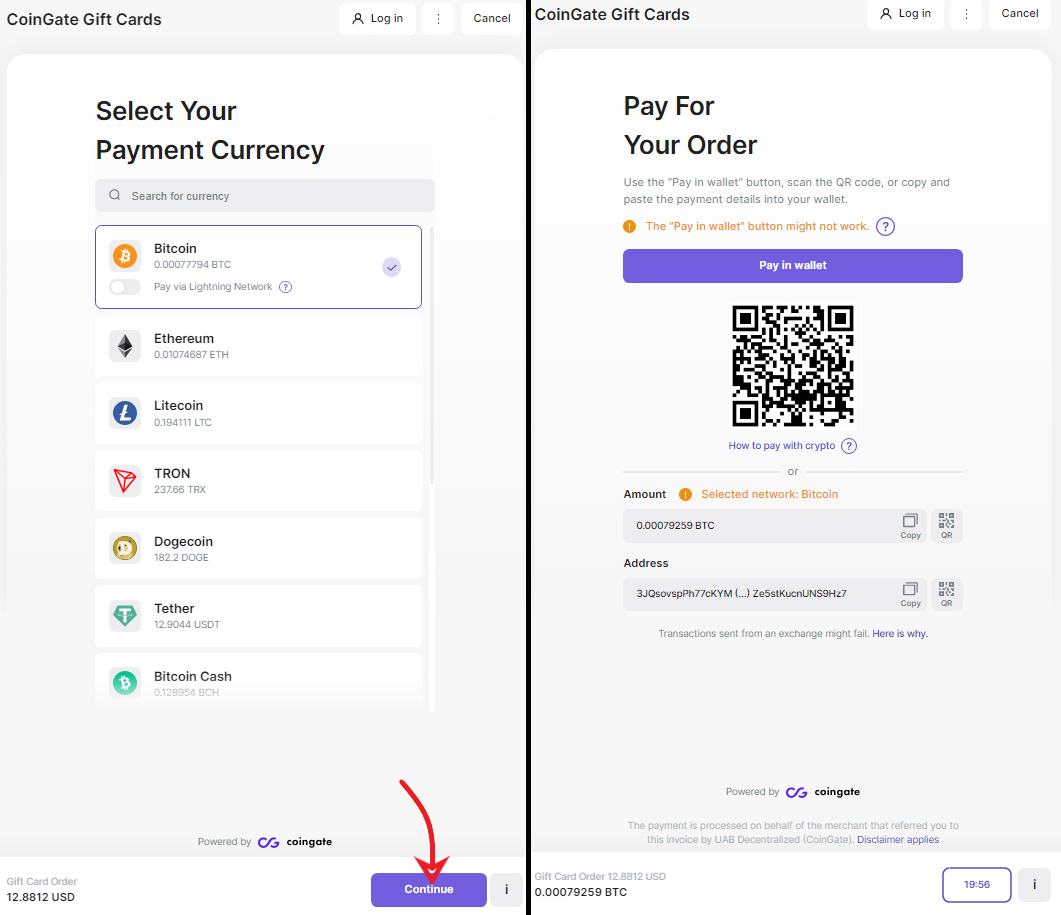
IMPORTANT: When paying with XRP, it is mandatory to provide a destination tag!
If you’re having trouble paying the invoice, check out this guide.
7. Check your email
Your gift cards should reach your email address in a couple of minutes. Delivery delays are uncommon but possible.
If you did not receive your vouchers, please contact our support team at support@coingate.com and let us know.
Written by:
Vilius B.
Knows as much about VPN as it is healthy for someone who isn't a VPN developer. Testing more text to see how it looks like. And a little bit more toblerone and on and on.
Knows as much about VPN as it is healthy for someone who isn't a VPN developer. Testing more text to see how it looks like. And a little bit more toblerone and on and on.
Related Articles


