

Accept crypto with CoinGate
Insights, product news and real crypto use cases
How To Enable CoinGate On Shopware To Accept Crypto
Any Shopware store owner can easily set up Bitcoin and crypto payments on their website with a simple installation of CoinGate extension.
Find a step-by-step guide below for detailed instructions on how to install and set up a crypto payments extension for Shopware.
If you want to get more information about the benefits of having cryptocurrency payment options set up, check out this blog post.
How to set up the CoinGate extension for Shopware? Step-by-step guide
A quick note before we start: for testing purposes, we recommend signing up for a CoinGate Sandbox account first.
Be mindful that for the ‘Test’ mode, you need to generate separate API credentials on your Sandbox account as regular API credentials will not work in a testing environment.
Do not forget to turn on the ‘Test Mode’ in the extension settings before testing.
CoinGate charges merchants a flat payment processing service fee of 1%.
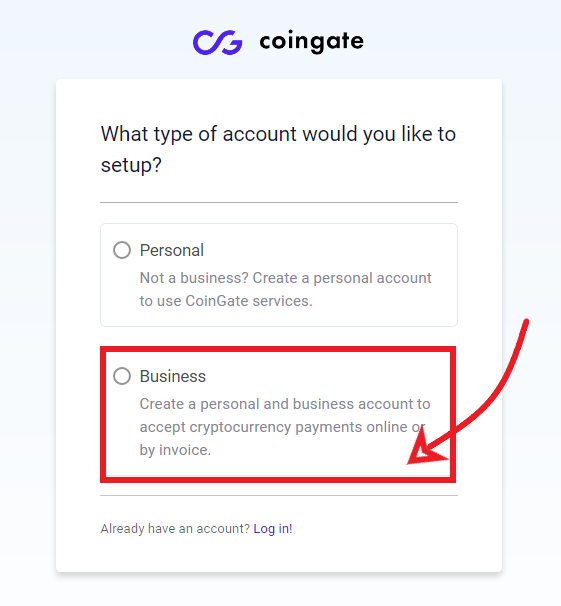
1. Create and verify a CoinGate business account
A verified CoinGate business account is required to use the cryptocurrency payment processing services. Start here.
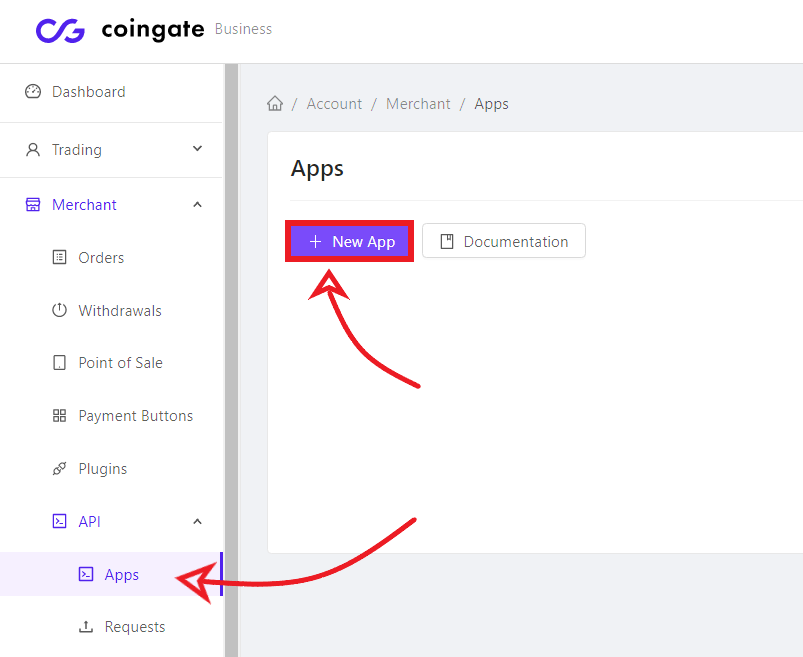
2. Create your API Authentication key
The API Authentication key allows you to connect your Shopware store to CoinGate. You can create your API Authentication key from your CoinGate account dashboard (Merchant > API > Apps > +New App).
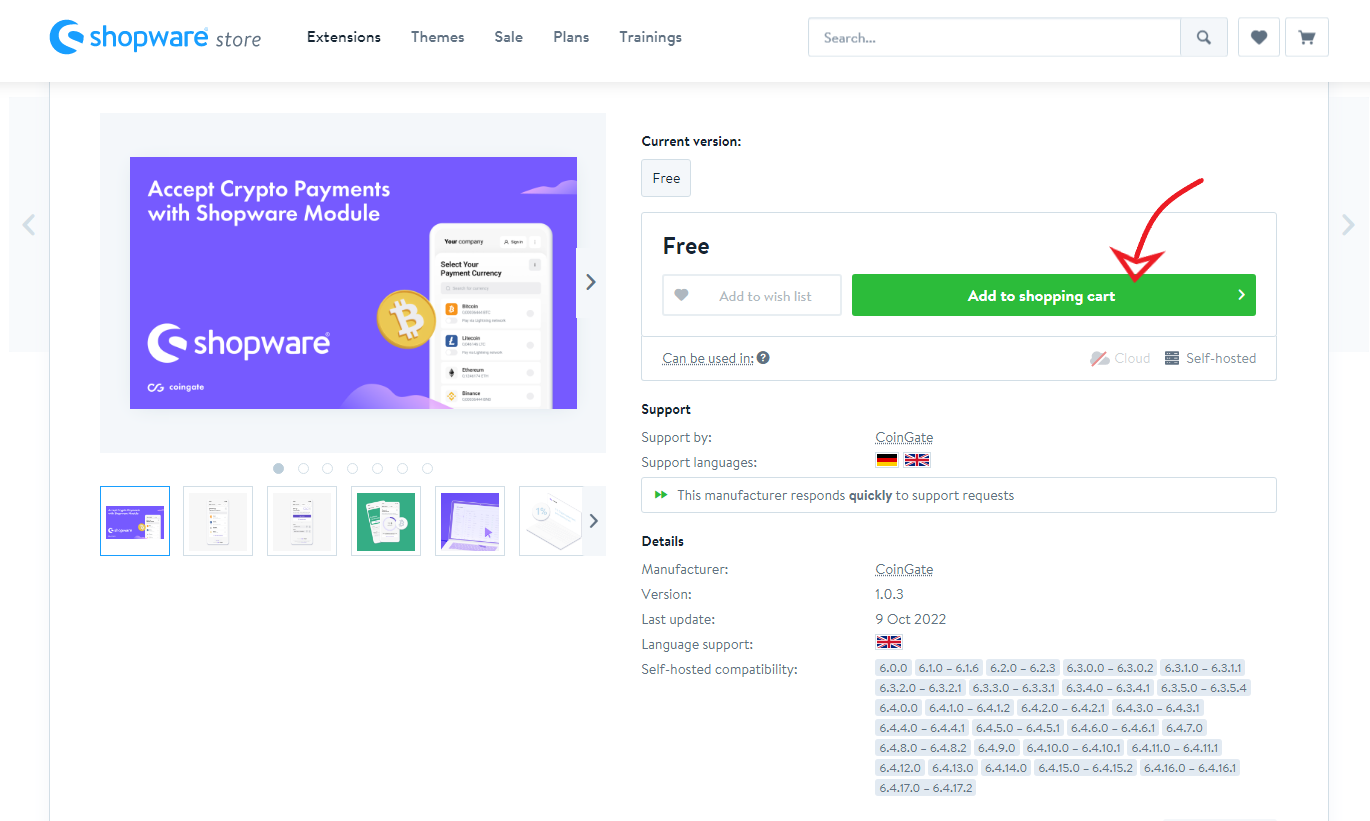
3. Download the extension for Shopware
The CoinGate payment plugin for Shopware is available to download from GitHub or the official Shopware Store.
4. Upload the extension to your Shopware website
Log into your Shopware site, then navigate to the ‘Extensions > My extensions’ menu section. Then, click the ‘Upload extension’ button and select the previously downloaded file.
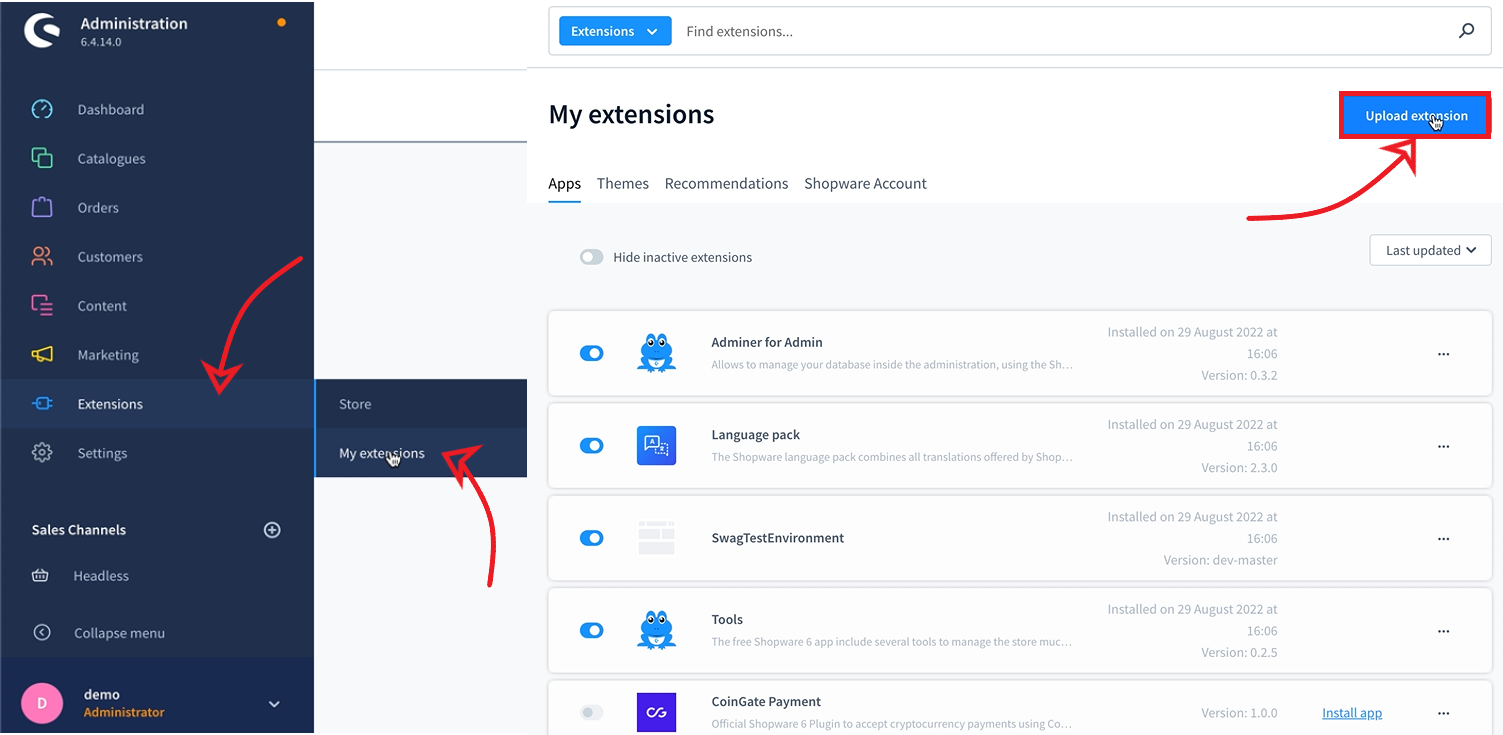
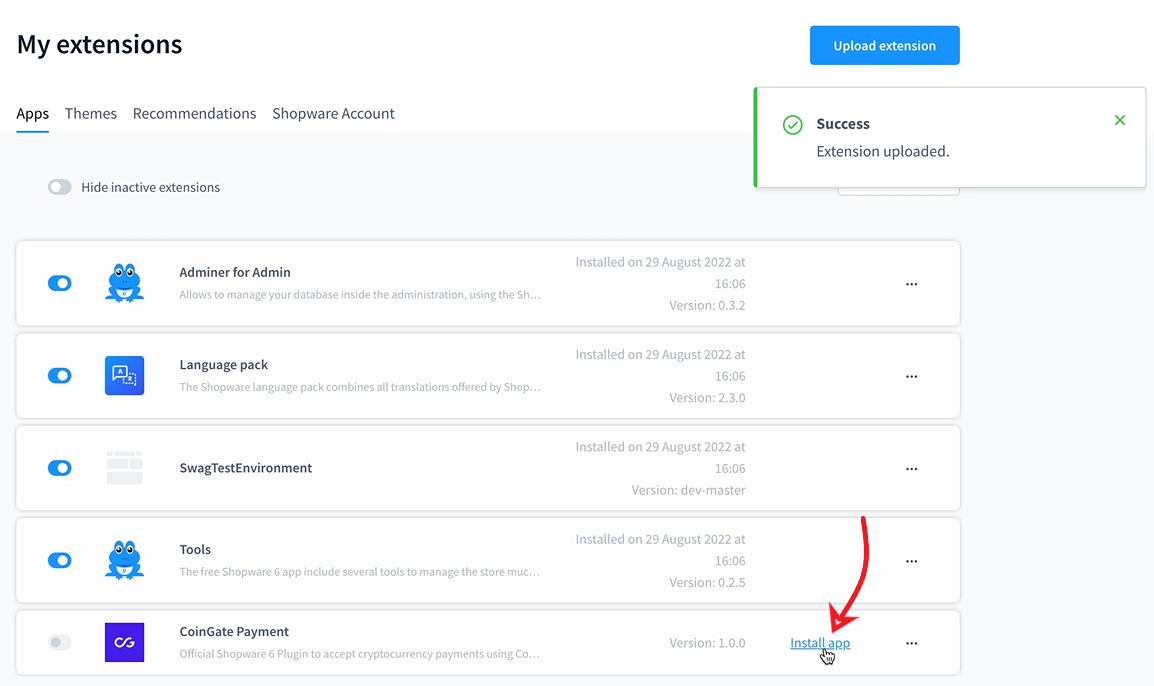
5. Install the extension
In the ‘Extensions > My extensions’ menu section, find the CoinGate payments extension and click the ‘Install app’ button. When done, turn it on.
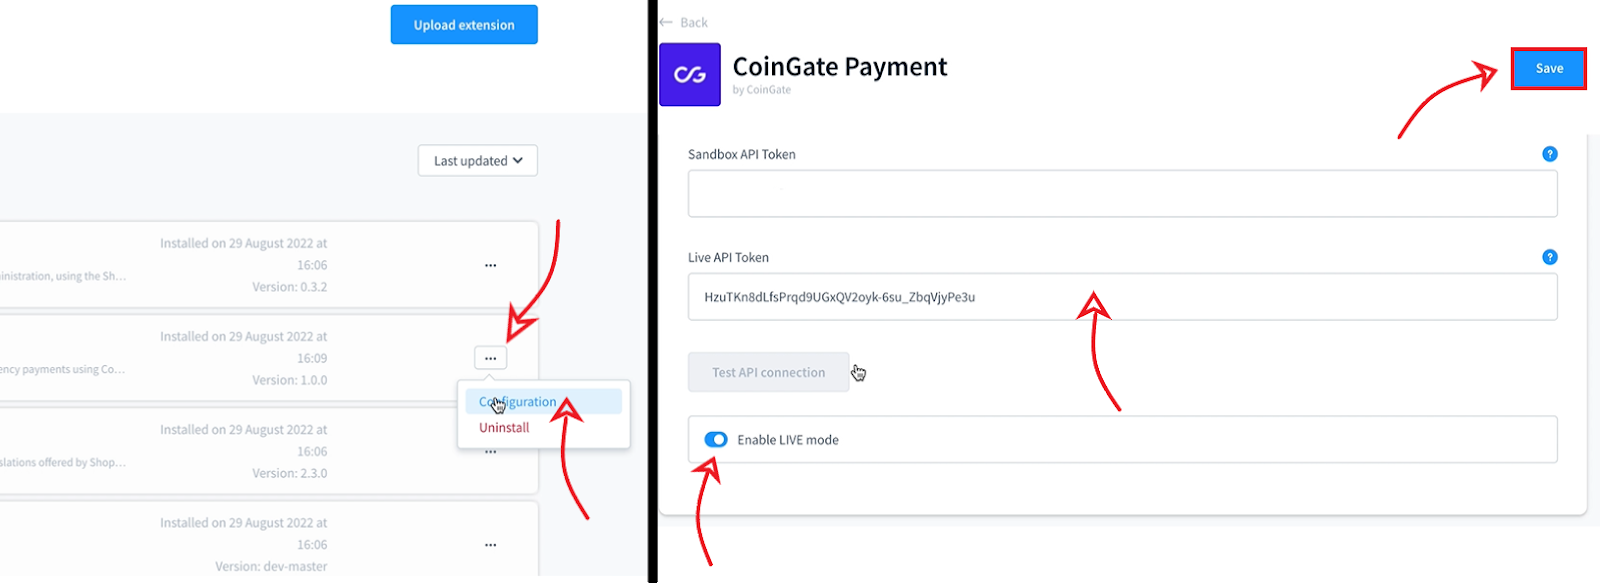
6. Configure the extension
Click on the settings icon next to the extension and click ‘Configuration’. Then, copy and paste the API key into the ‘Live API Token’ field and enable ‘LIVE mode’.
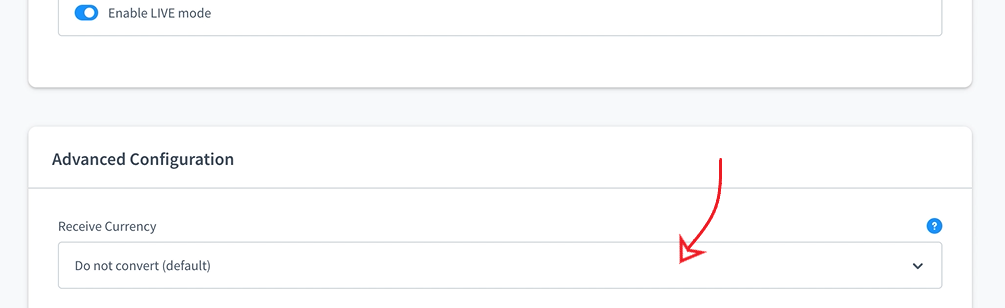
7. Choose a payout currency
Set a ‘Receive Currency’ parameter to whatever currency you wish to receive when you withdraw the collected funds and click ‘Save’.
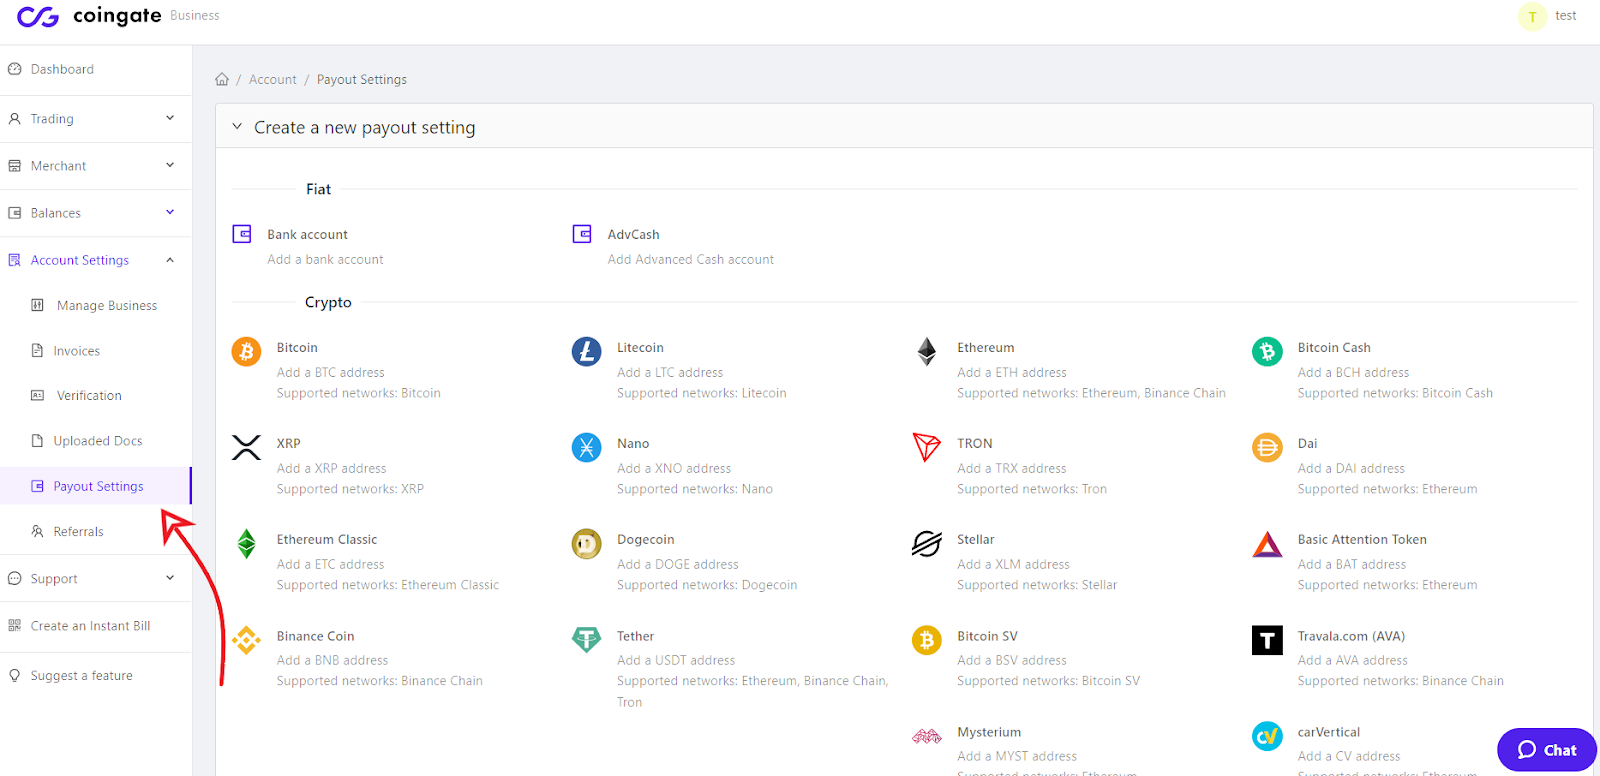
8. Add a payout address
Indicate a bank account or wallet address where to receive payouts. For that, log into your CoinGate account, navigate to ‘Account Settings > Payout Settings’ and add the payout address of a currency you set as ‘Payout Currency’ in step #7.
Other options for setting up cryptocurrency payment methods
CoinGate offers multiple methods for establishing crypto payment methods on e-commerce websites.
Besides plugins and extensions, merchants have other options, such as payment buttons, a Point-of-Sale (PoS) solution, and even a billing service for sending one-time bills via link or email, which can also be set up to bill customers on a recurring basis.
Learn more about other payment integration methods that CoinGate has to offer.
Accept crypto with CoinGate
Accept crypto with confidence using everything you need in one platform.