

Accept crypto with CoinGate
Insights, product news and real crypto use cases
Request crypto payments with instant (email) billing (2022)
Businesses, non-profits and freelance workers now have an option to accept crypto payments via billing service.
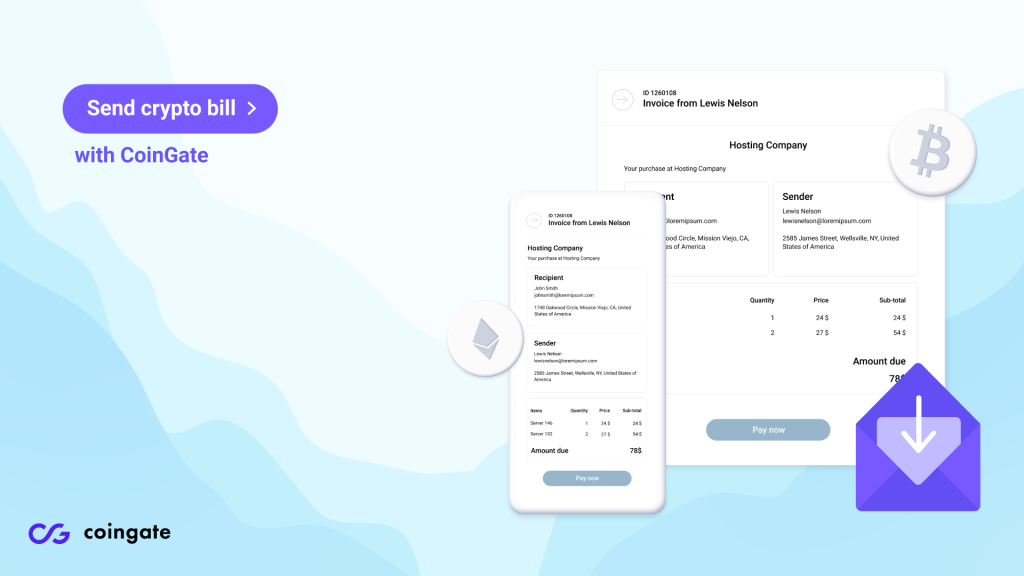
Billing allows any business account that’s verified on CoinGate to instantly create and send reusable cryptocurrency bills via email or a link with QR code. Here’s how to verify your business account.
The solution is available to use it from the account dashboard without any coding efforts at all.
You can also set a schedule to send bills recurringly and use API integration (optional). Learn how.
As with all other payment integration tools, instant billing allows accepting payments in over 70 cryptocurrencies with a feature to convert revenue to other coins or Euros / GBP / US dollars.
This service also supports Lightning Network payments for Bitcoin and Litecoin, account permissions and more.
The instant email billing solution
The ability to immediately send one-time crypto invoices via email or link can be practical in many different cases.
First off, it’s really simple–once logged in to a business account, you can start sending crypto bills immediately without spending any additional time on setup or coding. All payment details, contacts, as well as paid and unpaid bills, can be tracked on the same dashboard.
So, instead of setting up a whole payment method for one or a few clients to pay with crypto, generating one invoice to request the payment is a much more convenient approach to settle matters fast and without any inexplicable costs.

Simply share a link to it, or allow CoinGate to deliver the bill via email on your behalf. Then it’s for you to decide whether you want to keep the coin as it is, convert it to fiat currency or other coins.
How to create and send instant email bills
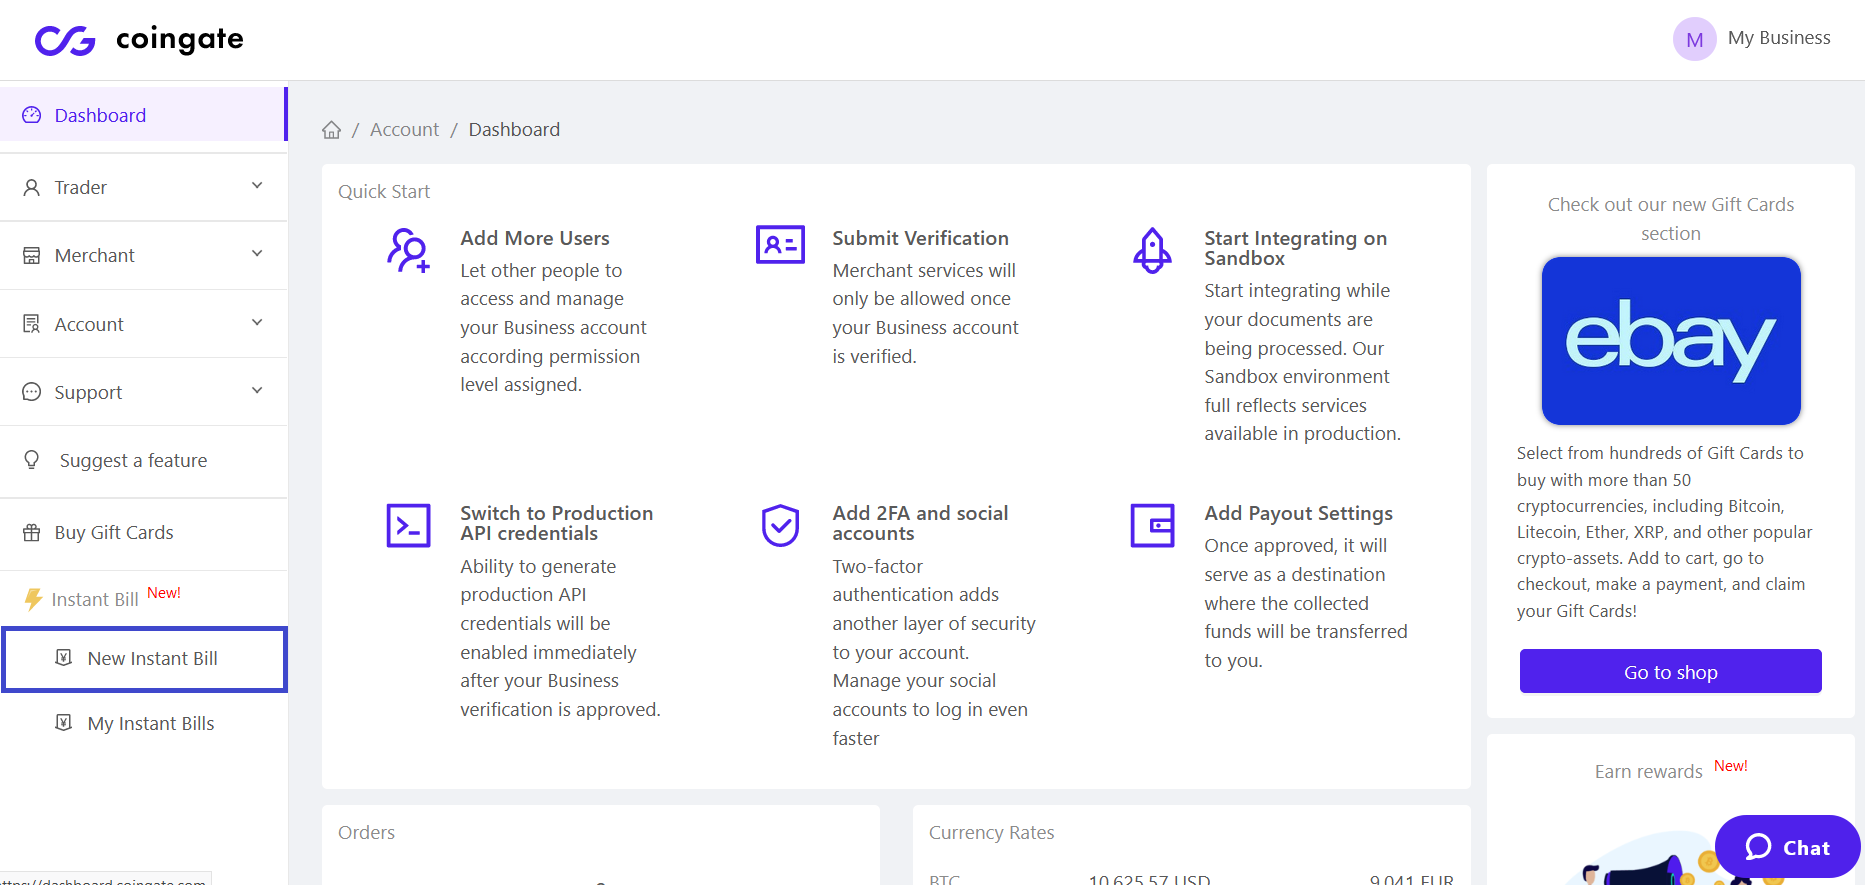
1. Log into your CoinGate business account
Note that you have to be verified in order to use this service. Here’s how to verify your business account
2. Find the “New Instant Bill” option in the menu
When clicked, a new window will pop up where you can start building your first crypto bill.
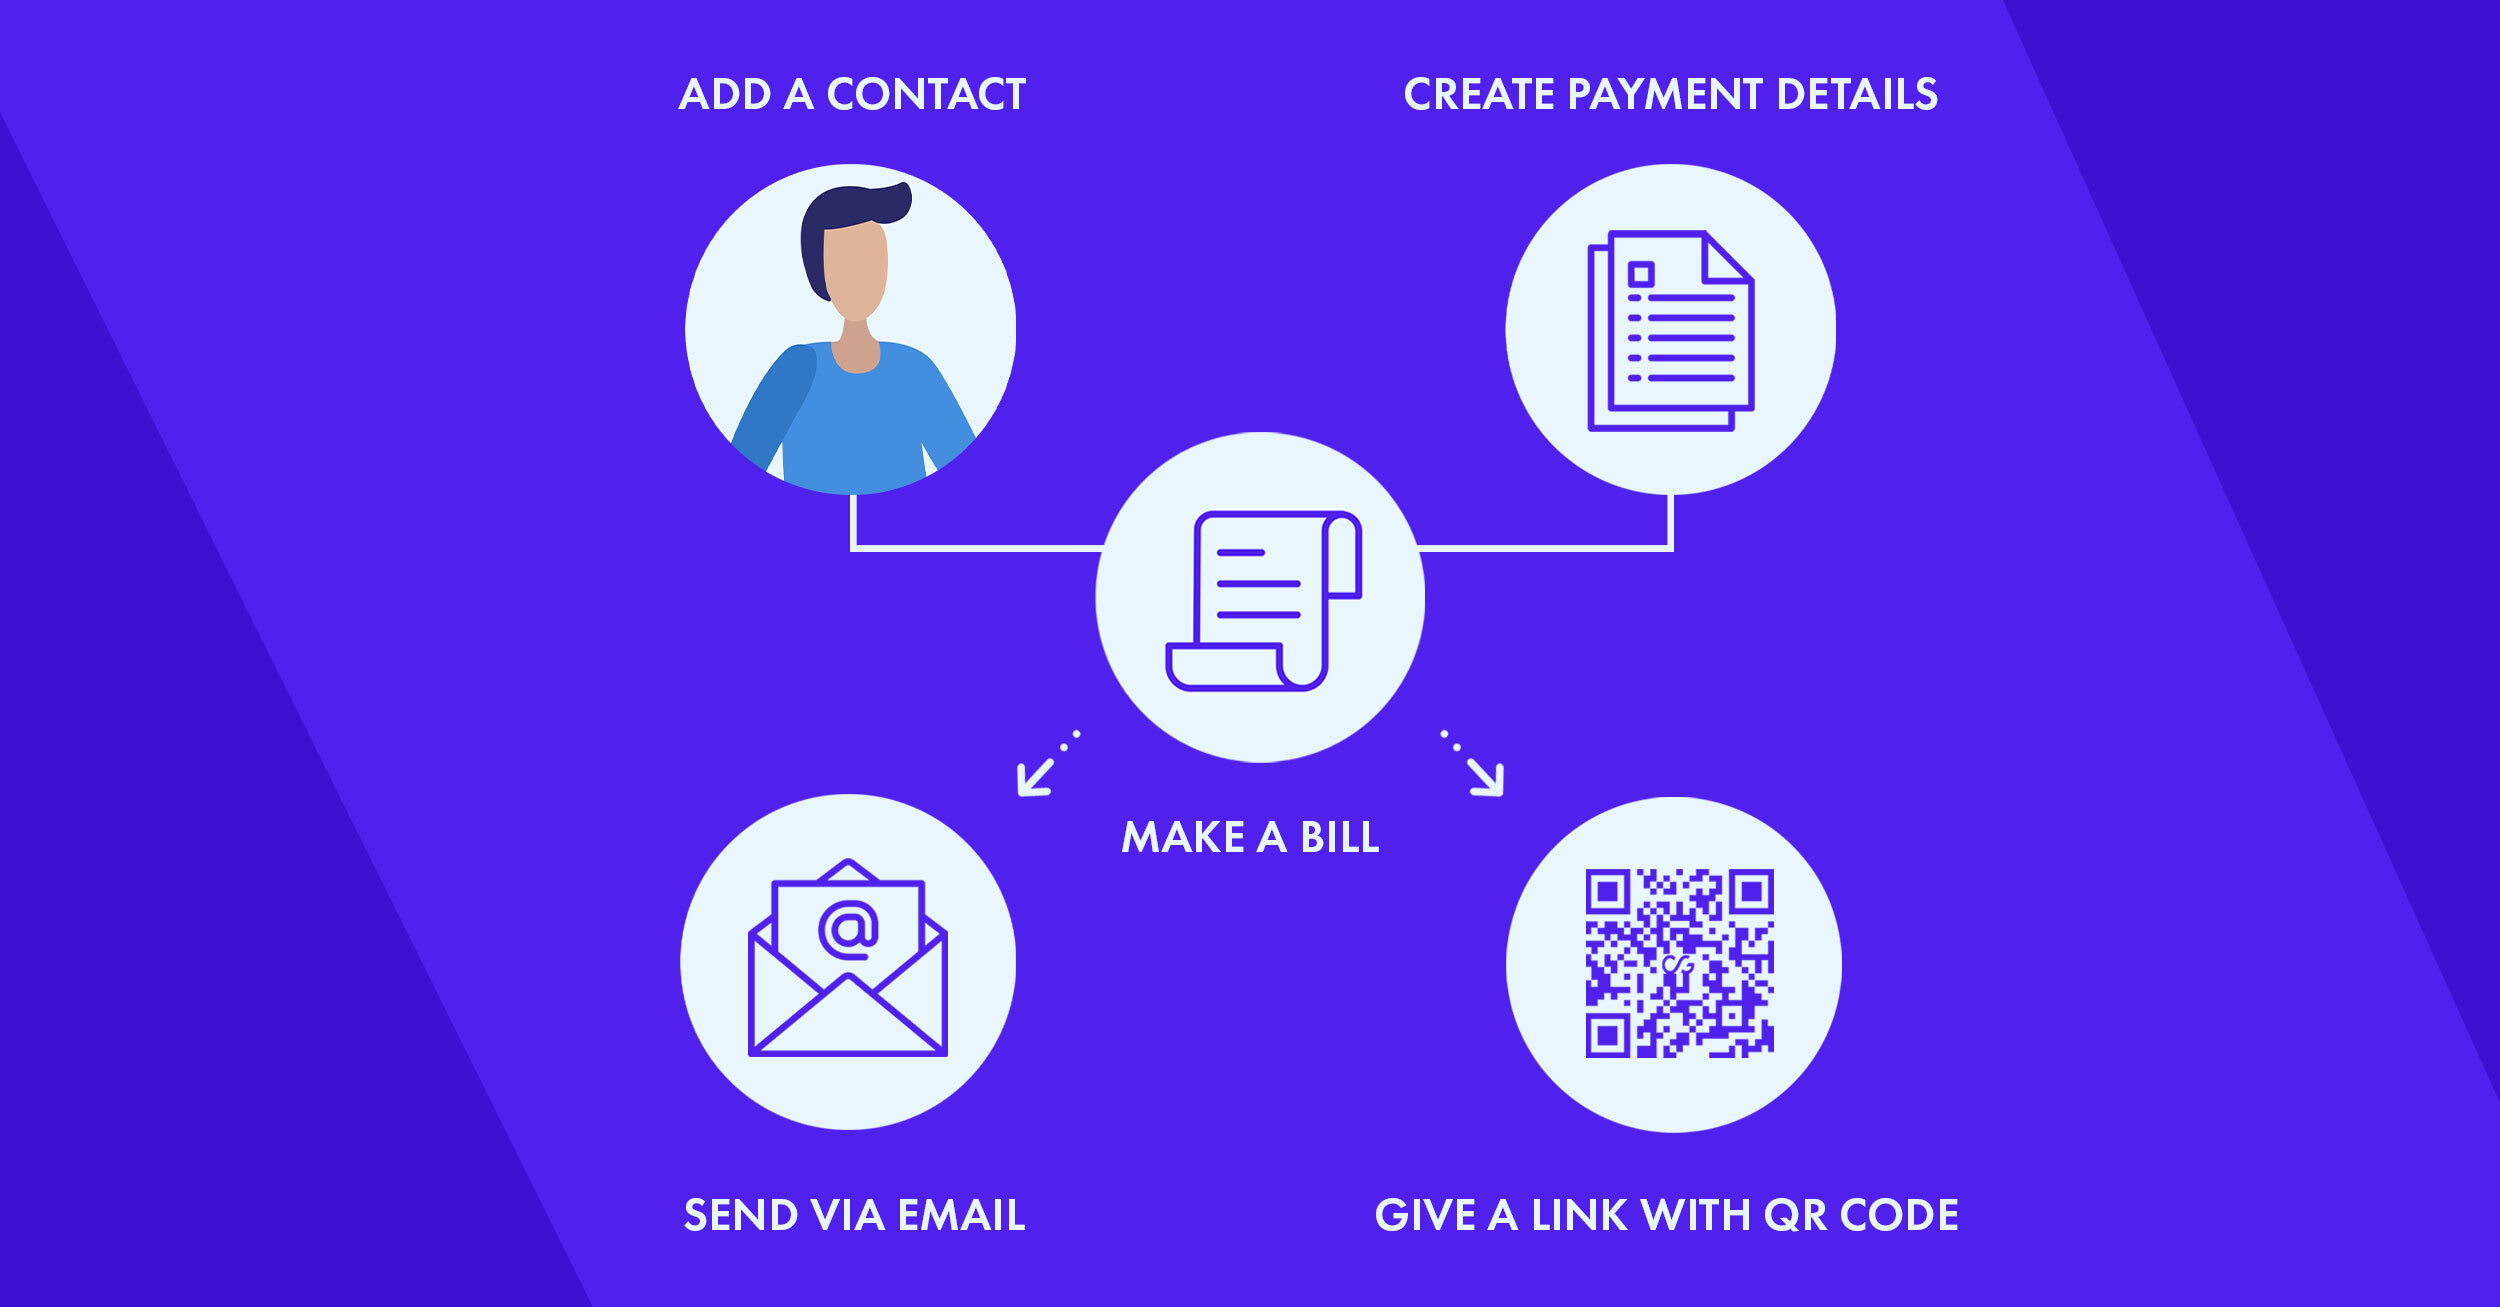
3. Select or add a new payer
Every time you add a new payer, it will remain in your contact list. To add a first contact, click the “Add new” button, then fill out the necessary information.
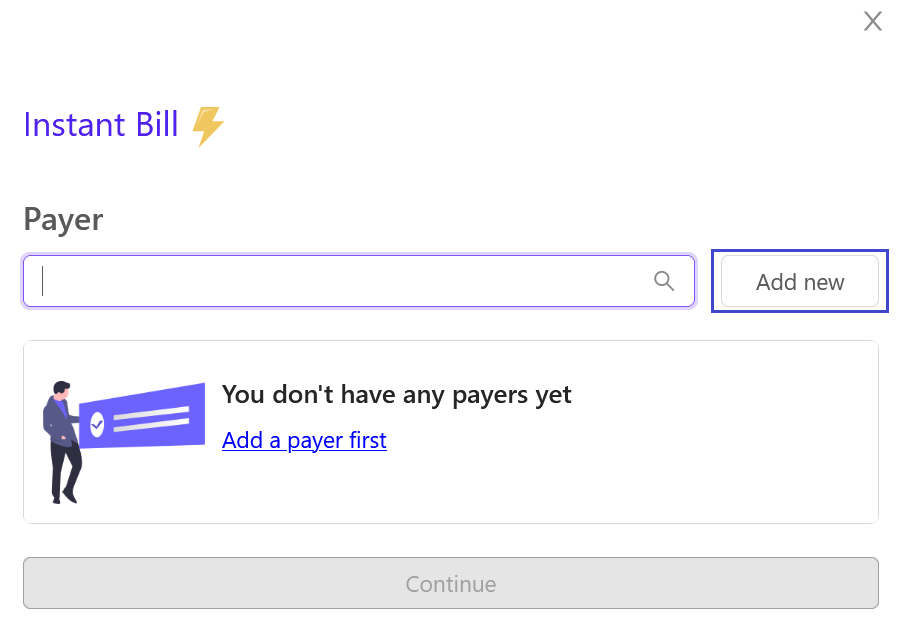
When adding a new payer, the only mandatory field is the payer’s email address, while everything else is optional to provide. You can also select whether your bill is intended for an organisation or a regular person.
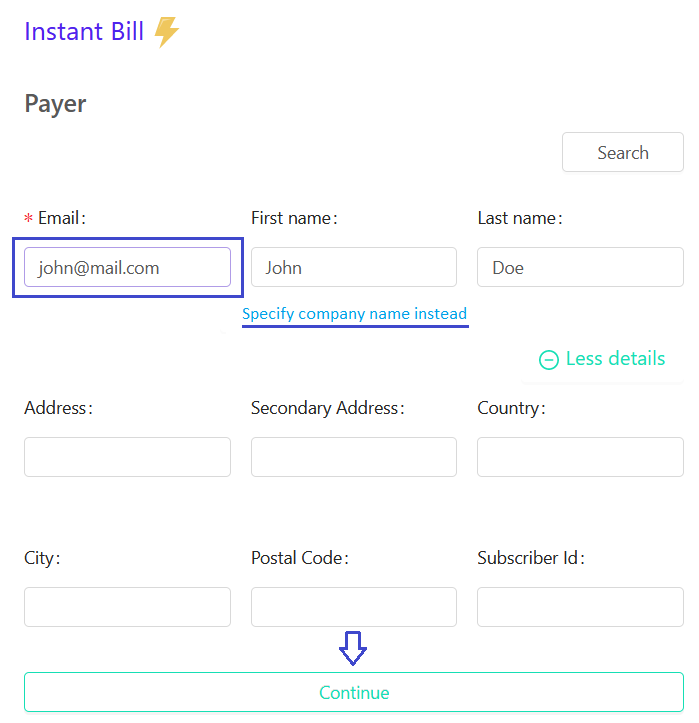
In the menu section, payers are referred to as “Subscribers”.
4. Select or add payment details
First off, name your bill so you can distinguish it from others. Also, select whether you wish to send this bill via email or a link with QR code, specify the amount and price currency (aka currency in which the total amount is shown).
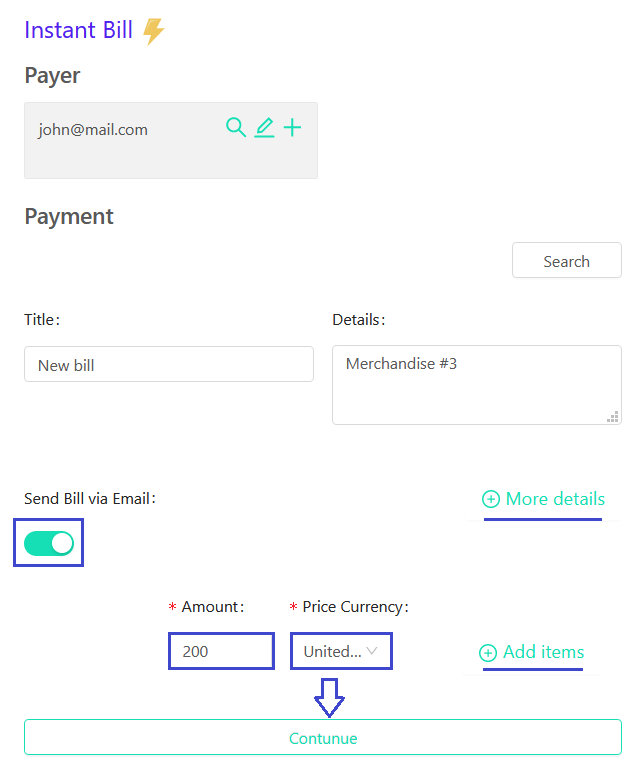
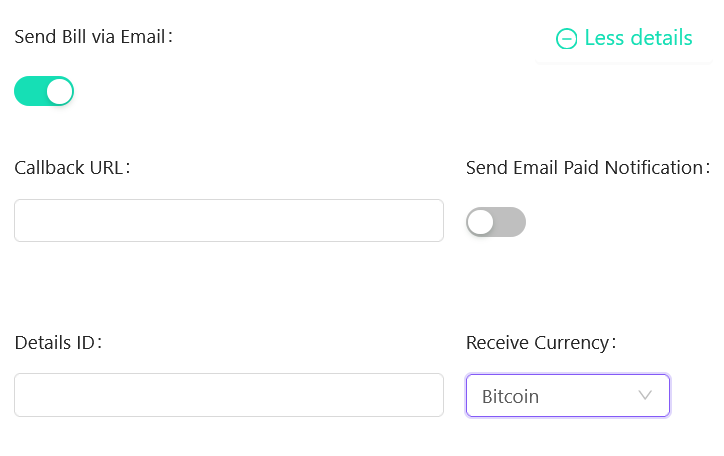
This is the most basic bill details that you can do; however, you can click the “More details” button to get more options:
- Set the “receive currency” settings. It determines what currency you will receive (Euros, GBP and US dollars included) once the invoice will be paid with any of 70 cryptocurrencies that it supports.
- Place URL to which the API callbacks will be sent in case you want to connect directly to your website’s system.
- Enable paid order notifications and add payment ID.
After that, you will be ready to name the price of merchandise and quantity. Feel free to add as many items as you want by clicking “Add items”.
5. Click the “Create a bill” button
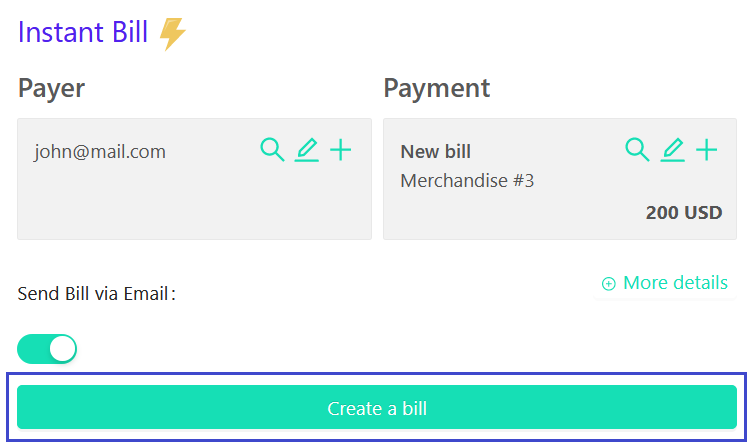
In the menu section, the saved payment details are referred to as “Details”. When the bill is sent, you can see the payment status under the “Payments” menu section.
Navigate to “Merchant”->”Billing” to find all menu sections dedicated to billing service.
For more in-depth information about this payment option and its technical aspects, refer to the billing API overview.
Activating recurring payments
There is one more menu section called “Subscriptions” (“Billing”→“Subscriptions”). This is where you can form payment schedules for your new and existing bills.
This option is perfect for subscription-based business models. Learn more.
Want to jump right into it? Sign up at CoinGate to get started, or log into your account, access the business environment and go to the “Merchant”→“Billing” menu section.
Accept crypto with CoinGate
Accept crypto with confidence using everything you need in one platform.